19 May 2015

Lighthouse Adventures and Magnificent Maine

Print Friendly and PDFPrint Friendly
#TossBackTuesday

I've never seen such beauty quite like the one possessed by Maine. I've visited some gorgeous places, but I don't know what it is about this state that has captured my heart...


Hope you are enjoying your day!

Get Your Feast On!!

18 May 2015

Hot or Cold Creamy Tomato and Gorgonzola Soup

Print Friendly and PDFPrint Friendly


A sharp and spicy twist to a classic dish.

Now that the beginning of the end of Summer is upon us and Autumn is just around the corner (yay!), my internal food-loving clock is starting to crave those comfort foods that embrace you from the inside out. Soups are my favorite all year round, but tomato soup in particular is one that I enjoy most when it's nippy outside and for some reason never fails to put me at ease.

As I mentioned in the title, this soup is not only delectable hot for the colder months, but can be enjoyed cold as well for a savory refreshment during these past HOT HOT HOT couple of days.


I added some Sriracha for the spicy/sweet yummy flavor and gorganzola for a sharp cheesy and creamy texture. Gorgonzola cheese is not for everyone, so you can certainly substitute with blue cheese or even a sharp cheddar would be delightful.


Creamy Tomato and Gorgonzola Soup


Ingredients
  • 1 cup chopped tomatoes (any kind)
  • 2 medium sized onions chopped
  • 1 large carrot chopped
  • 1 stalk celery chopped
  • 1 medium potato chopped
  • 2 garlic cloves crushed
  • 3 tablespoons ketchup
  • 1 cup tomato juice/sauce
  • pinch salt and pepper to taste
  • 1 1/2 teaspoons sugar (or to taste)
  • handful gorganzola cheese crumbles (or taste)
Cooking Directions
  1. Roughly chop all the vegetables and place in a pot of water.
  2. Bring to a boil, then lower heat.
  3. Simmer vegetables for 30-45 minutes or until vegetables are very tender.
  4. Using an immersion blender or a separate blender, blend until completely pureed (no lumps).
  5. Add salt, pepper, and sugar to taste.
  6. Add gorgonzola cheese also taste.
  7. Allow to continue simmering until cheese is melted in.
  8. Garnish with fresh chopped basil and pork rinds.
To serve COLD: Chill in the refrigerator and add extra basil/cilantro for freshness and a dollop of plain Greek yoghurt

Storage: Freeze in chinese containers or any airtight container for up to 4 months!


I know I've been crap at updating my blog lately, but with a recent surge of inspiration (from what, I still don't know), I hope to be more consistent and rediscover my love of blogging...especially about yum yum's!

Get Your Feast On!

Healthy Couscous Salad & Study Sunday

Print Friendly and PDFPrint Friendly
(I seem to have misplaced my camera, so I apologize as my phone camera's quality isn't that great.)


As I'm starting to get back into the swing of things in regards to my health (mental & physical), as well as returning to the world of academics, I've rediscovered inspiration to start blogging again! I find that it eases any anxiety that manages to sneak up on me, which is always a plus haha.

This recipe is nothing new and/or innovative, but I still felt it needed to be included in my "recipe filing cabinet" that is my blog for future reference because it's so simple yet so good and has helped me stay on the right track.

I've been munching on this as part of my pre and post workout meals. It's also been my go-to snack for when I'm studying--no surprise since couscous contains loads of fiber (digestion), B vitamins (energy),  lean vegetarian protein (muscle replenishment and fuel), and good fats (cholesterol) among many other benefits.


Healthy Couscous Salad

Ingredients
  • 8 ounces whole wheat cous cous
  • 1 1/2 cups water
  • 1 cup (2 whole cobs) sweet corn
  • 1/2 cup green pepper
  • 3 medium sized roma tomatoes cubed
  • 3-4 tbsp extra-virgin olive oil
  • salt and pepper to taste
  • 2-3 whole limes juiced
Cooking Directions
  1. Cook cous cous according to package instructions (I usually do 1 C to 1 1/2 C cous cous to h2o ratio) in a medium saucepan or microwave. Fluff cous cous with a fork, then set aside to slightly cool off. Steam corn, then remove kernels from cob. Chop up tomatoes and pepper. Combine all ingredients in a bowl. Season with salt and pepper. Mix. Drizzle with extra-virgin olive oil. Mix. Add lime juice. Mix. Refrigerate for at least 20 minutes until ready serve. Enjoy!!

Another beautiful thing about couscous, like many complex carbs is its versatility. You can eat it as is, heat it up for a nice side dish,  or even stuff it into bell peppers and bake for a comforting vegetarian meal after a long hard day. I've read as well it can be made into a dessert, so I'll be looking into that. Exciting!


Until then, I probably should get back to studying now. 

Get Your Feast On! 

04 August 2014

1st Attempt at Samosas!

Print Friendly and PDFPrint Friendly

As you can see, shaping the wrapper can be difficult at first but with practice only will you find success!
 
These deep fried flavor filled savory morsels of pastry goodness are simple, delicious, and satisfying-- A great snack to make for entertaining or as your contribution to a cook-out/bbq/picnic all of which tend to pop up in copious amounts during the summer months. But hey, who says you can't enjoy them all year round. No One! I love making these as well during the colder season as I liken eating these to getting a nice warm hug.

Not to mention, they're deep fried and vegetarian. Everyone wins! haha :o)


Simple and Easy Samosas


Ingredients
  • 2 cups all-purpose flour
  • 1/2 teaspoon salt
  • 2 tablespoons butter
  • 1/4 cup water
  • 2 tablespoons butter/canola oil
  • 1 medium onion chopped
  • 4 medium sized potatoes chopped
  • 3 cloves garlic minced
  • 2 teaspoons ginger minced
  • salt and pepper to taste
  • 1 teaspoon chili powder
  • 2 teaspoons garam masala
  • 1/2 teaspoon turmeric
  • salt and pepper to taste
  • 1 teaspoon lemon juice freshly squeezed
  • 1 small jalapeno pepper minced (optional)
Cooking Directions
  1. For the wrapper: In a large bowl, combine flour, salt and butter until the mixture resembles fine bread crumbs. Pour in water little at a time until dough-like consistency. Form a ball. Place on a lightly floured surface and knead for 10 minutes, or until dough is smooth and elastic. Shape into a disc then wrap with plastic wrap. Set aside to rest for at least 10 minutes.
  2. For Filling: Saute potatoes, onions, garlic, pepper, spices, over medium heat until potatoes are fork tender and onions are very soft and translucent. In a separate bowl, mash everything together until well combined. Set aside.
  3. Assembly: Preheat oil in a deep skillet or sauce pan to 375 degrees F.
  4. Roll out dough, then divide into roughly 12-15 equal portions. Shape out circles using a cookie cutter or rim of mug/cup. Cut each circle in half, then roll each half into cones. Place dollop of filling (approx. 1 tablespoon more or less) into the cones. Press together the edges until thoroughly sealed (you may have to dampen the edges with water first)
  5. Cook: Slowly submerge samosas, a few at a time, into preheated oil to fry until golden brown.


Overall first attempt verdict: A SUCCESS!!

Get Your Feast On!

24 October 2013

Move Over Mae Ploy! - (Easy) Sweet Chili Sauce Recipe

Print Friendly and PDFPrint Friendly


How foolish of me to have posted a Lumpia recipe without even mentioning the perfect dip to go with it!!--Sweet Chili Sauce along with Sriacha are probably my 2 favorite condiments of all time (next to mayo and ketchup). Particularly with protein whether it's chicken, fish, steak, even in a BBQ sauce, and of course egg rolls, I enjoy a side of this sauce.

The bottled kind is more mild, sweet, but still extremely delicious. My version is more tailored to my more spicy and less tart preference, which is why I was so excited to have learned how to make this. I thank the youtube channel called RunnyRunny9 for the basic tips! I also added some salt for a little depth.

Now that I know just how easy it is to make this, I look forward to saving a few bucks since all the ingredients are a staple in our pantry! Feel free to try this out yourself and create YOUR perfect sauce! :o)


Homemade Sweet Chili Sauce

Ingredients
  • 1/4 Cup Water
  • 2 tablespoons white vinegar
  • 1/2 teaspoon red chili flakes (more if you want more heat)
  • 3 tablespoons sugar
  • pinch salt
  • 1 teaspoon cold water
  • 1 teaspoon corn starch
Cooking Directions
  1. Over medium heat, combine water, vinegar, and sugar in a medium sauce pot. Heat until sugar is fully dissolved.
  2. Add chili flakes and salt. Wait until slightly bubbling (not full boil)
  3. In a separate container (small bowl) dissolve corn starch (1 teaspoon) in cold water (1 teaspoon). Add into pot.
  4. Lower heat and continue stirring until sauce thickens.


Get Your Feast On!

02 October 2013

Lumpia - Filipino Shanghai Style Eggroll

Print Friendly and PDFPrint Friendly


This is probably in the Top 5 most popular Filipino appetizers. You can't really go wrong with this dish. Almost everyone enjoys lumpia. Make it for movie night/tailgating or a potluck, it will be a sure hit! :o)

For this recipe, I stayed with a VERY basic version explained to me by my parents as this was more experimental/impulsive than anything. My brother doesn't eat seafood, so I omitted the ground shrimp.  This can be a little time consuming, yes, but can be prepared ahead of time for convenience. This is also a great dish to have your kids involved in the kitchen (and some extra sets of hands! hehe)


Shanghai Style Filipino - Lumpia


Ingredients
  • 1 lb ground pork
  • 1 medium jicama chopped
  • 4 carrot stalks chopped
  • 1 teaspoon salt or soy sauce
  • 1 teaspoon pepper
  • 1 teaspoon granulated onion
  • 1 teaspoon granulated garlic
  • 1 package spring roll wrappers (or wonton wrappers)
  • 1 quart oil for frying
  • optional: 1 lb shrimp ground
  • optional:1 cup green onions chopped
Cooking Directions
  1. Using a knife or food processor, mince carrots and jicama.
  2. Combine with ground pork in a mixing bowl. Add seasonings. Combine thoroughly.
  3. Assembling eggroll (refer to pictures below)
  4. Deep fry 3 or 4 at a time in 350 degree F oil until golden brown on all sides (5 minutes)
  5. Meat will still be slightly pink when ready. If too pink, double fry in lower heat.
  6. Serve with sweet chilli sauce.


The amount of filling is up to you and how big you like your egg roll. 
(If unsure - the width of your thumb)


 I ended up cutting each wrapper in half, but the process is still the same. Use water to seal the egg roll.


I dusted the surface with a little bit of flour to prevent sticking while they wait to be fried.


Get Your Feast On!

09 September 2013

Easy 5 Ingredient Potato and Spinach Casserole

Print Friendly and PDFPrint Friendly


BTW, for the 5 ingredients, I did not include the spices!

This easy casserole recipe was a result of a failed plan to make gratin. Unfortunately I didn't have enough spinach or potato to build a good "gratin" foundation, so instead I improvised and created a simpler casserole instead. Luckily, it came out delicious. My younger brother who is quite the fussy eater enjoyed it so much that he kept looking for it again the rest of the night haha.

I will definitely be making this comfort meal all throughout Autumn maybe even Thanksgiving! Not pictured above, is the ground beef I decided to add last minute for its flavor, but also for more substance.


Potato and Spinach Casserole

  
Ingredients
  • 3 medium potatoes thinly sliced
  • 1 package (12 oz) spinach chopped
  • 1/4 lb ground beef
  • 1 can Progresso 3 Cheese Recipe Starter
  • 1/2 teaspoon ground cumin
  • 1/2 teaspoon cinnamon (or nutmeg)
  • 1/2 teaspoon dried thyme
  • pinch salt and paper (or taste)
  • 3/4 cup bread crumbs
  • 1/4 cup parmesan cheese
  • drizzle extra virgin olive
Cooking Directions
  1. Prepare a pot of boiling water. Add sliced potatoes and allow to slightly cook (8-10 minutes). Drain and set aside.
  2. Preheat oven to broil setting 400 degrees F. Use 2nd rack from the top.
  3. In a deep skillet, saute ground beef until brown. Add cumin and season with some salt and pepper.
  4. Add spinach and 3 cheese sauce. Stir occasionally until spinach is fully wilted and cooked. Add cinnamon and thyme.
  5. Turn off heat. Continue to stir and be sure to evenly distribute ingredients through out pan.
  6. Layer slices of potato on top.
  7. Drizzle some extra virgin olive oil.
  8. Sprinkle bread crumbs evenly over potatoes. Follow up with sprinkle of parmesan cheese.
  9. Drizzle a little bit more olive on top top.
  10. Place skillet in oven and broil until top is golden brown.


Get Your Feast On!

01 September 2013

BAPS Shri Swaminarayan Mandir & OOTD

Print Friendly and PDFPrint Friendly


A few days ago, my family and I visited a nearby BAPS Shri Swaminarayan Mandir. Although the Hindu temple was still under construction, the Haveli as well as the gardens around were open to the public. We even enjoyed an authentic Indian meal! I'm not the most knowledgeable when it comes to Indian culture, but I was extremely delighted to have this experience.

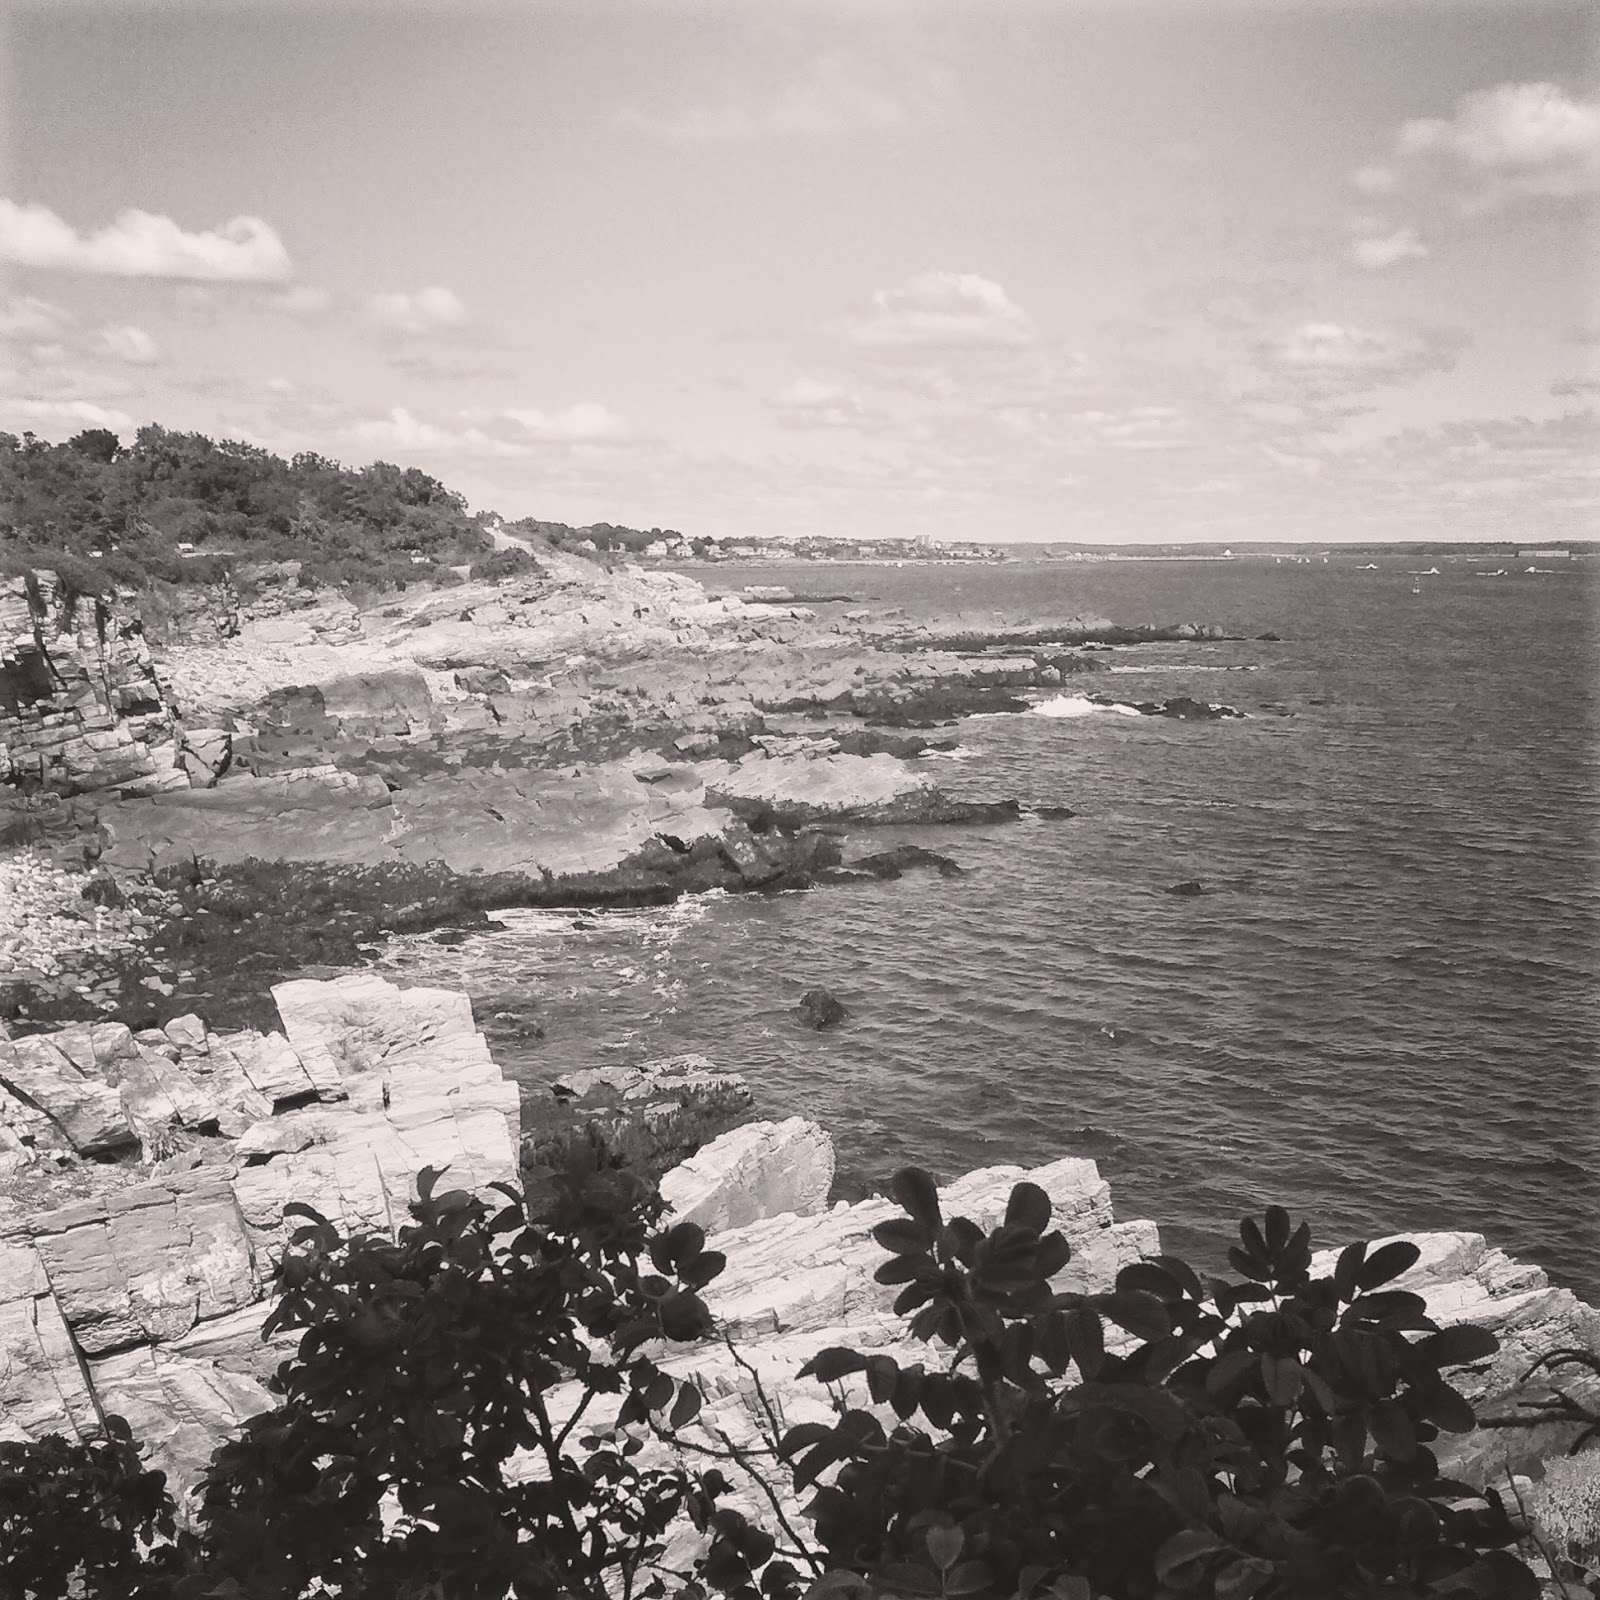
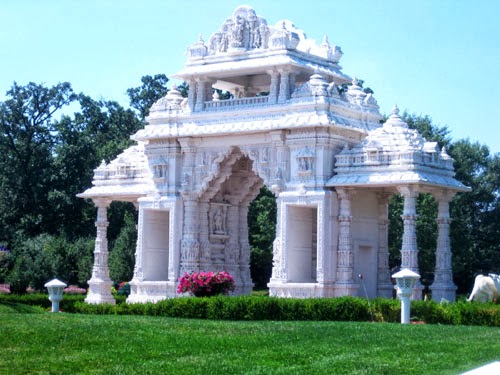
Welcome. As you drive passed the gates, you're greeted by a magnificent spectacle complete with a horse drawn carriage underneath majestic hand carved pillars, a gorgeous fountain, perfectly groomed topiaries at every turn, and a white picturesque temple of the same hand carvings straight out of a movie set.


Haveli. Open to the public at the time of our visit, we were asked to take off our shoes and a guide was able to tell us a bit more about the place. It was when he mentioned there was Indian food being served when I found myself getting antsy from excitement. Still shoeless, we entered an area where wraps were provided to cover the shoulders and legs. Fortunately for me, I anticipated this and dressed accordingly beforehand.


OOTD. I went with a long colorful skirt that covered my legs (Costco of all places haha), a black tank top, and my favorite hat (Forever 21). I also brought a long scarf (Wal-Mart) I'd use as a wrap for when I was inside the temple as I wasn't aware that the temple provided wraps for the visitors! Better prepared than sorry! :o)


Mandir. We descended a few flights of marble stairs into a long hallway filled with large posters about the contributions of Indian culture as well Hinduism to the world. At the end of the hallway was an area where we could make a wish and pour water over a golden statue, which I regret taking a pass on! Just before that, however, is another set of stairs that would take you up to the  Mandir. Lights illuminated and ricocheted off more hand carved ivory pillars creating a scene from a fairy. It was just beautiful.  If only I had photos to share as I know my description doesn't do it justice at all, but unfortunately it was prohibited.
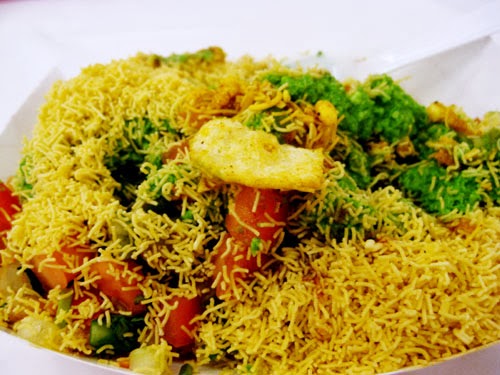


Bhel Mix

Shayona.  Finally we made our way to the Shayona, an Indian vegetarian cafeteria/restaurant. I ordered the Bhel Mix which was quite delicious, 
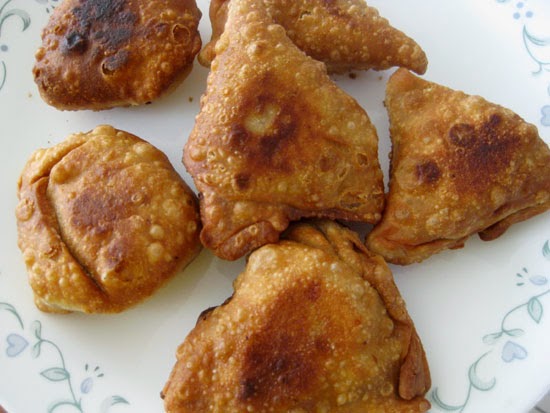
but a little on the sweet side for me. My brother ordered the Samosas, which were too spicy for him so I devoured them. My parents ordered Thali, which was also very yummy and for dessert we all enjoyed a nice cold Lassi.


After a delicious meal we exited the back where we were pleasantly surprised by a pair of peacocks just casually roaming the property :o)


Overall, my experience at BAPS in Bartlett was amazing. I felt like I was in another country. I was even thrilled to get quick glimpses at what looked like a traditional Hindu wedding where all the men and women, whether they were part of the wedding or just guests, wore the most beautiful colorful traditional Indian dresses/suits. The people there including the volunteers were all so nice. A definite must-visit in Chicago.


Get Your Feast On!

18 August 2013

What I've Been Eating: Key West Edition

Print Friendly and PDFPrint Friendly
 Key Lime Pie

 My new favorite, Cuban Bread!!


 Conch Fritters

SUPER Fresh Oysters

Cuban Sandwich

Get Your Feast On!
Related Posts Plugin for WordPress, Blogger...